Sight-in Tips for Crossbow Hunters
Your new crossbow is an incredible hunting tool, but only if you take the time to set it up properly
You’ve had your heart set on a new crossbow since the end of last season, and you’ve finally saved up, swiped your card, and brought it home. It’s a beauty, and it came with bolts, a quiver, a cocking mechanism, and a scope with yardage markers extending from 20 yards all the way out to 100. All you need to do is thread on some broadheads and hit the woods, right?
Hold up! As hunt-ready as your new crossbow appears to be, you’ll need to spend significant time with it on the range to ensure that it’s sighted in properly and that your Wasp broadheads are hitting exactly where they should. You’ll also want to practice extensively at longer ranges. Even though your scope is marked to 100 yards, chances are your effective hunting range will be a fair bit closer than that. Here are some pointers for sighting in your new crossbow.
GET A GOOD TARGET
A block of Styrofoam with a target on the face won’t cut it for today’s high-performance crossbows. First, the target must be rated for crossbows so that it safely stops your bolts. We also suggest a target with dots or bull’s-eyes rather than a 3-D target for the sight-in process, as you’ll be able to aim more precisely at individual dots than at a deer target’s large kill zone. And you might actually want two targets, one bag target and one foam target rated for broadhead use. If you can only get one target, get the foam one, as you’ll need to do some shooting with your broadheads before going hunting.
USE A REST
The mechanics of shooting and sighting in a crossbow are similar to shooting a rifle. You need a steady rest and a known distance, and you need to shoot consistent groups of several arrows before adjusting your scope. Doing that requires removing as much potential human error as possible. Before you head out to shoot, make sure you have a rest to stabilize your crossbow and scope picture. A solid bench or table with sandbags is a good start, but a tripod rest that securely locks the crossbow into place is a good substitute. The goal is to eliminate any movement of the crossbow and scope as you squeeze the trigger.
WATCH THOSE FINGERS!
Modern crossbows are engineered with guards and safeties that discourage putting hands and fingers close to strings and limbs in the field. But shooting from a rest can obscure some of those guards, and old habits from shooting rifles can often put a crossbow shooter’s fingers in harm’s way. Be sure that your off hand is out of the way and accounted for anytime you’re shooting a crossbow, but especially so when shooting from a rest!
TRY A PAPER TARGET
Many new crossbow shooters are surprised by the incredible accuracy of their equipment. At closer ranges, shooting multiple arrows in a group is all but guaranteed to destroy some nocks, fletchings, and carbon shafts. And crossbow arrows are expensive. Veteran crossbow shooters often tape or staple paper rifle targets to the face of their bow targets, and then shoot one arrow at a time, using the holes in the paper target to evaluate groups. It’s more time consuming, but it can save a good bit of money and frustration from ruined arrows.
START CLOSE
Even if the scope was mounted by the dealer or manufacturer, it might not be 100% sighted in. So, start very close to the target, within 10 to 15 yards. Aim for the center of the target so that you have some leeway in case the scope is way off. If you hit near where you aimed, you’re good to move back to 20 yards and work on groups. If you’re more than a few inches off at 10 yards, which is rare, check the scope to make sure it is mounted securely, and then make the necessary windage and elevation adjustments to dial the arrow into place.
Most crossbow scopes are regulated to move the point of impact 1/2 inch per click at 100 yards (compared to MOA riflescopes, which move 1/4 inch at the same distance). This is to make sighting in at close range faster and easier. Still, you’ll need to turn the dial quite a few clicks at 10 yards to see any results if you’re very far off the mark. Once you’re hitting close at 20 yards, shoot groups of at least three arrows before adjusting your scope. The goal is to identify a pattern, such as one inch high and two inches to the right. Once you know that, you can adjust your scope accordingly until you’re hitting exactly where you put the crosshair. Once you get your 20-yard crosshair dialed in, you’re ready for the next step.
VERIFY RETICLE MARKS
 Most adjustable-magnification crossbow scopes with yardage reticles must be dialed to a specific magnification before the holdover between the reticle marks is accurate. Slower crossbows require more distance between the marks, and therefore lower magnification.
Higher-end crossbow scopes usually have velocity figures etched in where a riflescope would normally have the magnification (like 8x or 12x) etched in. Once you know your crossbow’s velocity, turn the magnification dial until it corresponds (like, 425 fps). Then, begin confirming all of the yardage lines/dots out to the scope’s maximum distance. If you find that your bolts are impacting low or high at a given distance, make fine adjustments to the magnification before messing with windage and elevation adjustments. This will adjust your bolt impact at every yardage other than 20 yards; the 20-yard crosshair or dot is the center of the reticle and it doesn’t change regardless of the scope’s magnification.
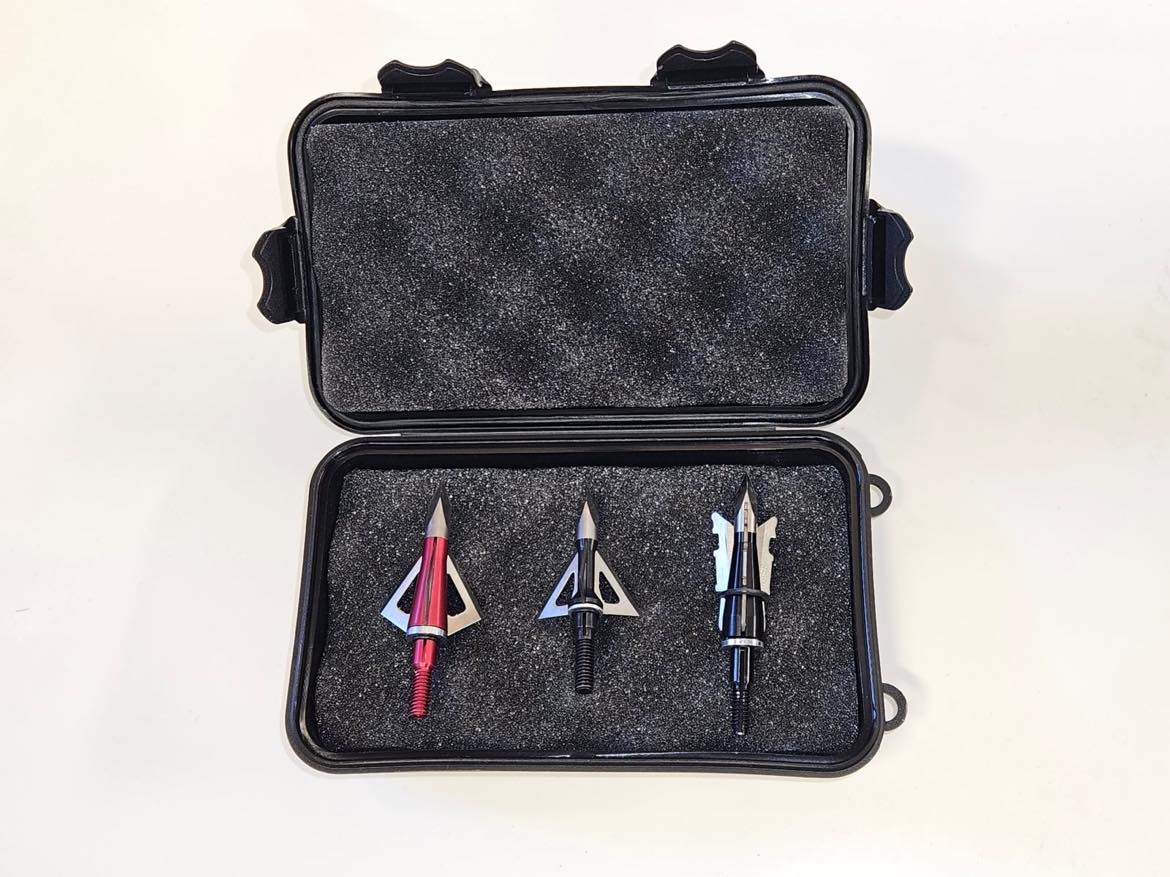
Once you’ve finessed the scope magnification to where all of your aiming marks are on out to the scope’s maximum range, you need to check the setup with broadheads. We take pride in building precise, consistent broadheads that are well designed, but high crossbow speeds can create some mysterious flight issues that may vary even from one crossbow to the next. Just as most rifles have a load that they like best, most crossbows will shoot better with one or two particular broadheads over all the rest. We recommend that every new crossbow shooter start out with a Wasp Pick 3 pack, which allows you to try three different broadhead styles without investing in a full package of any of them. Once you settle on the style that shoots best from your crossbow, then you can stock up for hunting season.
— Story and Pick 3 Pack image by Wasp Archery Staff; target image by John Hafner
View All Posts